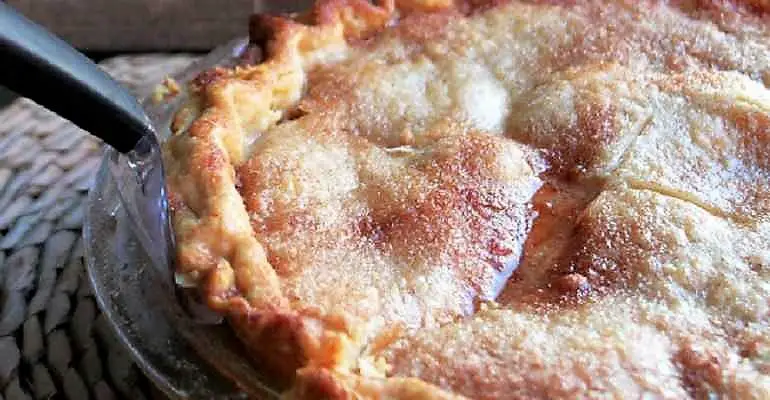
Being a Southerner myself, I am downright partial to anything peach. I’ve even been known to quaff peach schnapps, upon occasion. But nothing in the world beats a peach pie, ahem, cobbler in my estimation. I even agree with using canned or frozen peaches, as the fresh ones have to cook longer to become fully edible – far longer than a tender crust can bear, even if tented with foil.
But I must confess that in all my many years of eating peach desserts – regardless of what they might be called – I have never, ever, been served one with three separate and distinct layers of crust. So you just know that I will be trying this! I may try the 3-crust approach – maybe it is used to soak up the extra juice.
INGREDIENTS
2 (28-ounce) cans of peaches, drained
1½ cups granulated sugar
1 stick of butter, melted
3 tablespoons corn starch
2 teaspoons cinnamon
2 teaspoons lemon juice
1 teaspoon vanilla
½ teaspoon lemon zest
1 pack of refrigerated pie crust (2 crusts per pack)
INSTRUCTIONS
Preheat oven to 375 degrees F.
Mix ½ cup sugar and 1 teaspoon cinnamon together. Set aside.
Butter a 9-inch deep pie dish. Place 1 pie crust into the bottom of the dish. Prick with a fork all over, and sprinkle 1 tablespoon of cinnamon sugar on top of the crust. Set aside.
In a large bowl, add peaches, ½ stick of melted butter, cinnamon, sugar, lemon juice, zest, vanilla, and corn starch, mixing well.
Place filling on top of pie crust, take remaining pie crust and top the cobbler with it. Fold edges underneath and crimp to the best of your ability. Take remaining melted butter and spread butter on top of pie crust. Sprinkle with cinnamon/sugar and cut slits in the top to vent the steam.
Bake for 40-50 minutes or until top is golden brown. Remove from oven and allow cobbler to rest about 30 minutes before cutting. Serve with whipped cream or ice cream.
USE RED NEXT PAGE LINK BELOW
NEXT
Quick Tip: If you are making this for a fancy occasion, check online for patterns to cut leaves, flowers and other shapes from the pie dough and decorate the outer rim of your pie crust.
Recipe and image courtesy of Lisa at Creole Contessa
Leave A Comment