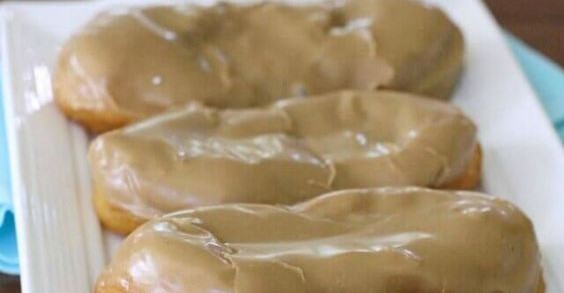
This recipe does call for a bit of stovetop babysitting, but you’ll be surprised at how fast it goes. Once you’ve got everything in place, you just need a couple minutes per donut per side, and then you’re all done. You’ll have a batch of these ready before the first one even has time to get cold, if you can resist eating it before you’re done with the rest! I know I couldn’t. I really can’t thank Butter With a Side of Bread enough for sharing this great recipe. Now I can enjoy one of my favorite donuts anytime! Bad for my waistline but better for my budget.
Ingredients
1 8-count can refrigerated biscuit dough
2 cups canola oil, for frying
1/4 cup butter
1/2 cup brown sugar
3 TBSP milk
1 TBSP corn syrup
2 tsp maple extract
2 cups powdered sugar
Instructions
Pour 2 cups of canola oil into a medium sized saucepan and begin heating on medium-low heat.
Open the biscuit dough and separate. Gently stretch the biscuits into an oblong shape, as opposed to the round shape they come in.
In a small saucepan, combine butter and brown sugar. Whisk in milk and heat for about 5 minutes on medium heat, stirring often, until butter is melted and sugar is dissolved.
Remove from heat and add in corn syrup and maple extract. Add in powdered sugar 1/2 cup at a time, whisking until smooth between additions. Add 1-2 tsp more milk if necessary. Glaze will begin to harden if you leave it sitting- which is what you want!
Once all powdered sugar is added, keep maple glaze warm on the stove, whisking occasionally.
Check the temperature of the oil using a digital thermometer– it needs to read 350 degrees F. Increase heat gradually if necessary.
Once oil is ready, drop bars in 2 at a time. Let cook for about 2 minutes, then turn and cook an additional 2 minutes on the other side. Bars should be a nice golden brown before being removed. Rest on a paper towel.
Let bars cool for a few minutes, then whisk the glaze to make sure it’s smooth enough to dip each bar. Dip the bar, then immediately turn glaze side up on a cooling rack.
Repeat this process until all bars are fried and glazed.
USE RED NEXT PAGE LINK BELOW
NEXT
Quick tip: These bars are best eaten right after being glazed, but you can enjoy them the next morning as well.
Recipe and image courtesy of Butter With a Side of Bread

Leave A Comment