Because this recipe is so quick and easy to make, if you keep the basic supplies on hand, you can very easily handle impromptu guests, treating them to an elegant dish with a minimum of fuss. Never again will you flounder around, wondering just what to serve your unexpected, drop-in guests!
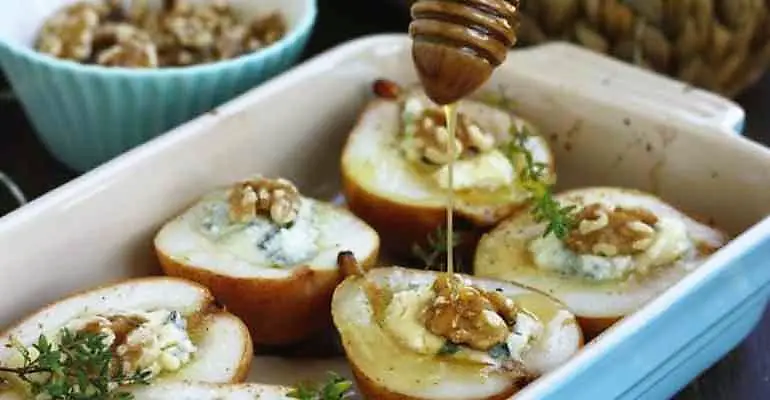
The combination of sweet and savory tastes, the yielding flesh of the pears, the creamy texture of the cheese, a little sweetness from the honey and some crunch provided by walnuts will create a very memorable dish for your guests. This dish can be served warm or cold, but the warm presentation really accentuates the melty cheese.
INGREDIENTS
3 ripe, but not too soft pears (see Quick Tip)
1 tablespoon liquid honey + more to serve
4 sprigs thyme
6 teaspoons soft blue cheese, like Gorgonzola
6 walnut halves, to garnish
Salt and freshly ground black pepper, to taste
INSTRUCTIONS
Preheat the oven to 200 °C or 390 °F. Cut pears in halves and scoop the seeds with a teaspoon or a melon baller. Place the halves cut sides facing upwards on a baking dish and drizzle with liquid honey. Place thyme on top and bake for 10 minutes or until the flesh is soft enough when pierced with a fork. Let cool.
Place a teaspoon of soft gorgonzola or any other blue cheese into each pear boat. Garnish with walnuts and drizzle with more honey if desired. Season with salt and freshly ground black pepper to taste. You can serve these baked pears both warm and cold. If you don’t want your cheese to melt, wait until the pears are cooled down completely before stuffing them with blue cheese. Enjoy!
USE RED NEXT PAGE LINK BELOW
NEXT
Quick Tip: Choose your pears for this dish carefully. Do not choose those that are overly ripe or soft, as they will lose their shape in the baking process, and you need a distinct well to place the cheese into. Look for ripe, but still firm, sweet pears, such as the Green Anjou variety. Pears are usually harvested before they are ripe, so the pears you find are likely to feel hard. They will continue to ripen off the tree, if you place them in a bowl on your countertop for a few days.
Recipe and image courtesy of Elena at Happy Kitchen.Rocks


Leave A Comment