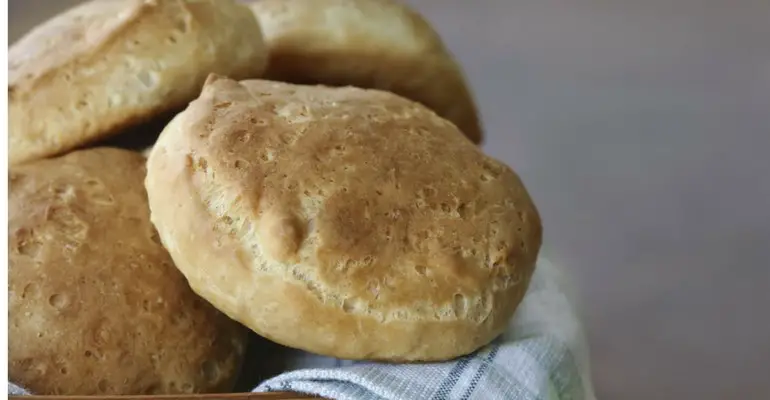
This biscuit recipe is one of the easiest things you’ll ever make and produces absolutely delicious biscuits! All it takes is self-rising flour and heavy cream—two items you can find at just about any grocery store, or if you’re a baker like me items you already have in your kitchen.
The taste and texture is spot on with my memories of the family biscuits I’ve spent a lifetime eating—so fluffy with just the right amount of crispy crunch on the outside. My whole family loves them and has requested that this be our go-to biscuit recipe from now on.
Ingredients:
2 1/4 cups commercial or homemade self-rising flour, divided
1 1/4 cups heavy cream, divided
Butter, softened or melted, for finishing
Directions:
Preheat oven to 450 degrees.
Select the baking pan by determining if a soft or crisp exterior is desired. For a soft exterior, use an 8- or 9-inch cake pan, a pizza pan, or an ovenproof skillet where the biscuits will nestle together snugly, creating the soft exterior while baking. For a crisp exterior, select a baking sheet or other baking pan where the biscuits can be placed wider apart, allowing air to circulate and create a crisper exterior. Brush selected pan with butter or oil.
Fork-sift or whisk 2 cups of the flour in a large bowl, preferably wider than it is deep, and set aside the remaining 1 ⁄ 4 cup. Make a deep hollow in the center of the flour with the back of your hand. Slowly but steadily stir 1 cup of cream, reserving 1 ⁄ 4 cream, into the hollow with a rubber spatula or large metal spoon, using broad circular strokes to quickly pull the flour into the cream. Mix just until the dry ingredients are moistened and the sticky dough begins to pull away from the sides of the bowl. If there is some flour remaining on the bottom and sides of the bowl, stir in just enough of the reserved cream, to incorporate the remaining flour into the shaggy, wettish dough. If the dough is too wet, use more flour when shaping.
Lightly sprinkle a plastic sheet, a board, or other clean surface with some of the reserved flour. Turn the dough out onto the board and sprinkle the top of the dough lightly with flour if sticky. With floured hands, fold the dough in half and pat it into a 1 ⁄ 3- to 1 ⁄ 2-inch-thick round, using a little additional flour only if needed. Flour again if sticky and fold the dough in half a second time.
If the dough is still clumpy, pat and fold a third time. Pat dough into a 1 ⁄ 2-inch-thick round for normal biscuits, a 3 ⁄ 4-inch-thick round for tall biscuits, or a 1-inch-thick round for giant biscuits. Brush off any visible flour from the top. For each biscuit, dip a 2-inch biscuit cutter into the reserved flour and cut out the biscuits, starting at the outside edge and cutting very close together, being careful not to twist the cutter. The scraps may be combined to make additional biscuits, although they will be tougher.
Using a metal spatula if necessary, move the biscuits to the pan or baking sheet. Bake the biscuits on the top rack of the oven for a total of 10 to 14 minutes, until light golden brown. After 6 minutes, rotate the pan in the oven so that the front of the pan is now turned to the back, and check to see if the bottoms are browning too quickly. If so, slide another baking pan underneath to add insulation and retard the browning. Continue baking another 4 to 8 minutes, until the biscuits are light golden brown. When they are done, remove from the oven and lightly brush the tops with softened or melted butter. Turn the biscuits out upside down on a plate to cool slightly. Serve hot, right side up.
USE RED NEXT PAGE LINK BELOW
NEXT
Quick tip: For a sweeter biscuit add up to ¼ cup of sugar to the dough—it works great for strawberry short cake!
Photo attribution and recipe courtesy of: The Splendid Table.


Leave A Comment